To maximize your profits, you need to fill your aircraft’s Weekly Schedule. This is the total number of sequential flights your aircraft executes over a seven-day period. In AMS, a well-optimized rotation ensures your plane isn’t sitting idle on the apron, but is constantly earning revenue.
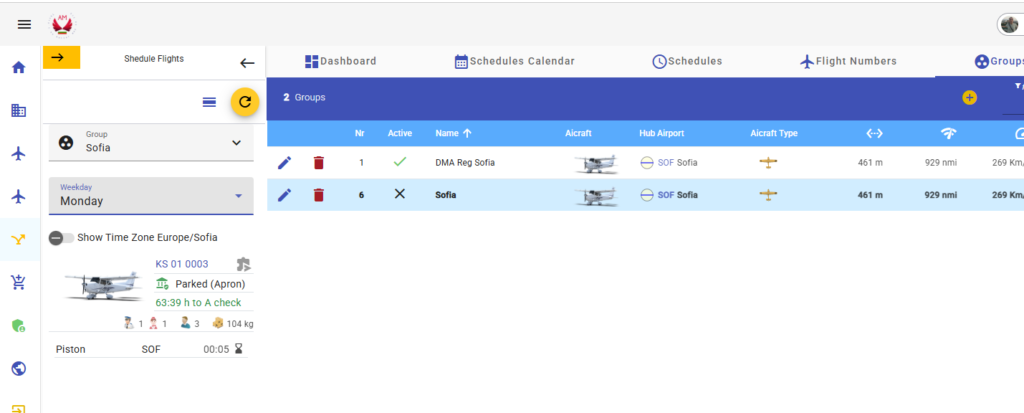
To create a Weekly Schedule (current name in the game is schedule flight group or just group) navigate to
 Flight Plan -> Schedule Flight -> Group

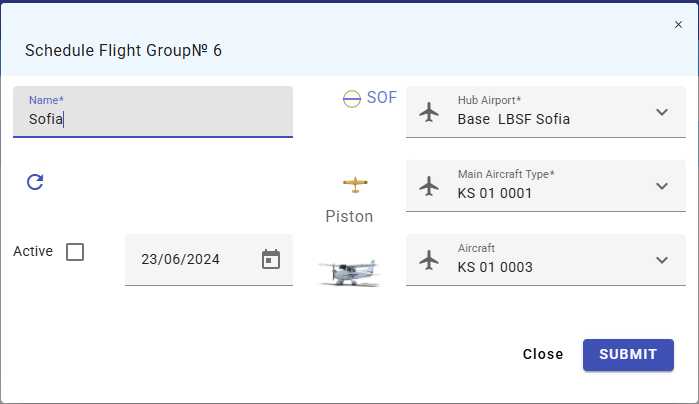
Understanding Schedule Flight Groups
A Schedule Flight Group acts as the brain of your operations. Here are the core properties you need to manage:
- Hub Airport: This is typically the starting and ending point for your aircraft’s rotation. Strategy Tip: Your aircraft receives significant discounts on maintenance and taxes when operating from its designated home airport. For maximum profit, ensure your Flight Group and your Aircraft are both assigned to the same Hub.
- Aircraft Type: This setting calculates taxes and flight times for your routes. It allows you to build a weekly schedule even before you’ve assigned a specific plane. This provides great flexibility, allowing you to swap aircraft of the same type in the future without rebuilding the entire schedule.
- Aircraft: This is the specific tail number assigned to execute the flights in this group.
- Activation Date: The date your weekly schedule begins. You can set this to a future date to plan your expansion in advance.
- Active Toggle: Once activated, flights will be generated one week in advance and tickets will go on sale.
- Note: Turning this off stops future flight generation, but any flights already scheduled and sold must still be executed.
First Step for New Players:
Create your weekly schedule in Non-Active mode first. Assign your aircraft and double-check your timings before toggling the “Active” switch to start selling tickets!
Step 2: Building Your Flight Plans
In Airline Manager (AMS), a Flight Plan is a specific blueprint for a route. It predefines the connection between two airports and carries a unique flight number and fixed duration.
Think of it this way: Flight Plans are the individual building blocks, while the Weekly Schedule is the final structure you build by sequencing those blocks at specific days and times.
The Most User-Friendly Method
While there are several ways to map out your routes, we recommend the following workflow for the best experience:
Filter Your View: Start by selecting your specific Group (Weekly Schedule) from the filter panel on the left side of the AMS interface. This ensures you group hub is selected as departure airport and your group aircraft cruising speed will be used for calculation of flight duration.
Navigating the Dashboard Map: Once you have selected your Group, switch over to the Dashboard tab. This provides a visual representation of your hub and the operational reach of your aircraft.
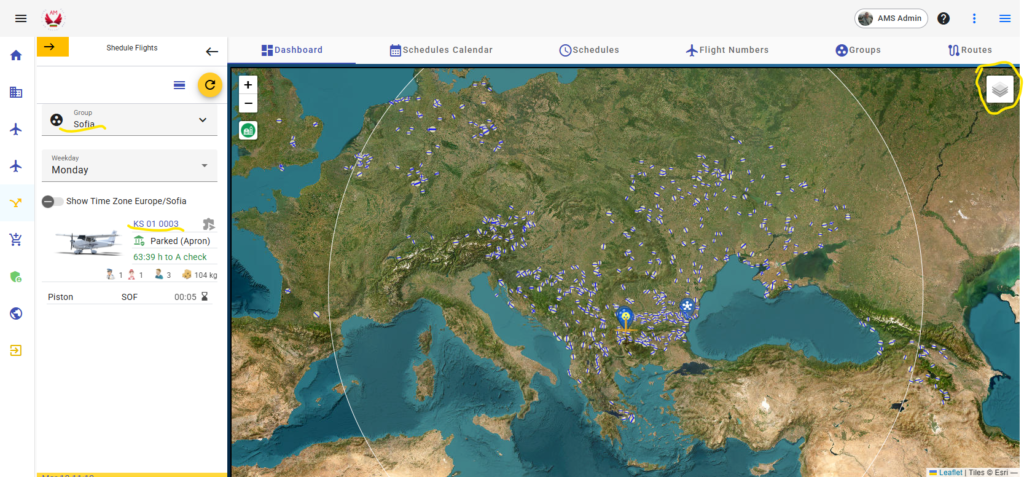
Using the Map Controls
On the right side of the map, you’ll find a control panel that allows you to toggle different layers on or off. This is essential for decluttering your view and planning routes precisely:
- Assigned Flights: This layer shows the specific flights already scheduled for your selected Group on a chosen day of the week. On the control in the right side of the map you can turn on/off airports, existing flight plans and also assigned flights for selected Group (Weekly Schedule) and day of the week
- Airports: Toggle this to see all potential destinations within your aircraft’s range.
- Existing Flight Plans: Turn this on to see routes you have already established for your airline.
Now that you can see your range on the map, it’s time to define your routes. Follow these steps to generate your unique flight numbers:
Creating New Flight Plans (Flight Numbers)
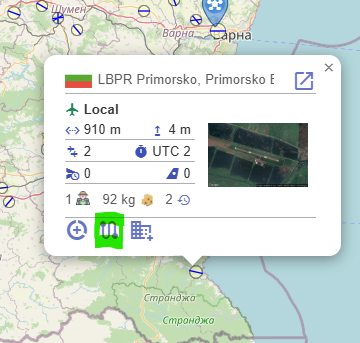
- Select a Destination: Find a target airport within your range and left-click on its icon.
- Create the Route: Click the “Create Round-Trip” icon (highlighted in green on the image).
- Adjust and Finalize: A flight plan form will appear. Here, you can fine-tune the flight duration if necessary. Once satisfied, hit Submit.
- Confirm the Result: The system will automatically generate a pair of flight plans (the outbound and the return leg) with unique flight numbers for your airline.
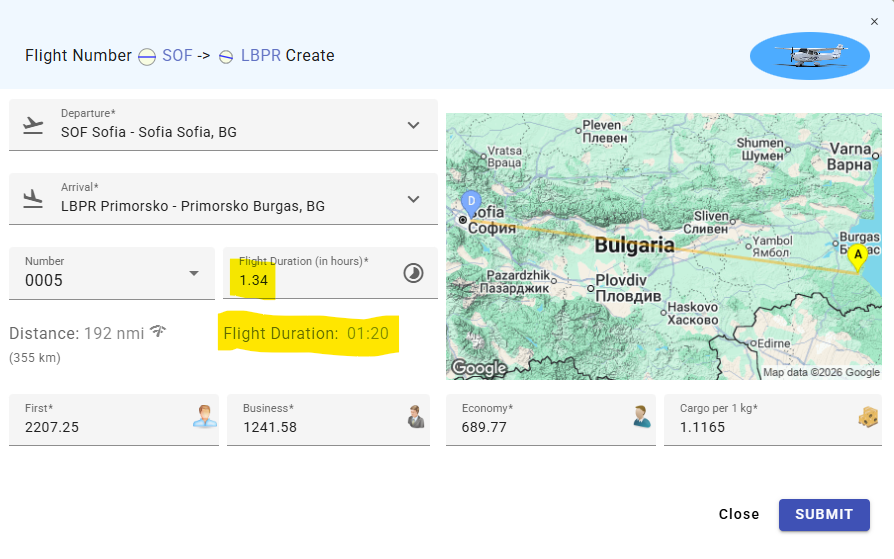
Repeat this process for every destination you want to include in your weekly schedule.
Step 3: Optimizing Prices and Flight Time
Once your flight plans are created, they aren’t quite ready for the weekly schedule. You need to ensure your tickets are priced to sell.
Accessing Your New Routes
Navigate to the Flight Numbers tab and refresh the content. Your newly created flight pairs will appear in the grid.
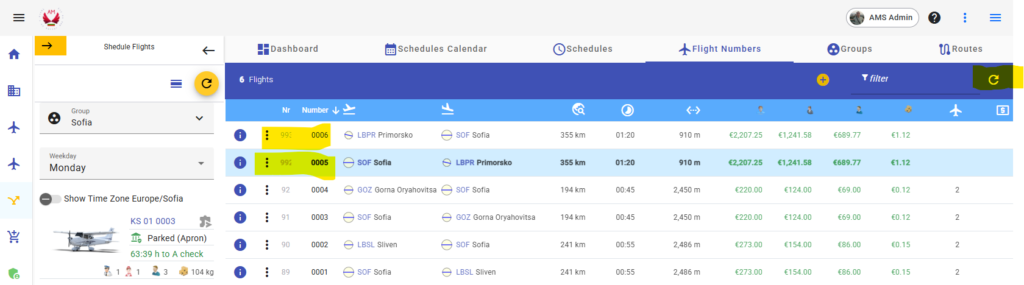
The Pricing Strategy (The 15-20% Rule)
By default, the game sets ticket prices at the absolute maximum a customer might pay. However, in AMS, passengers and cargo often take up to four transfer flights to reach their final destination. To stay competitive and fill your planes, we recommend a more realistic pricing strategy:
The Recommendation: Lower your ticket prices to roughly 15–20% of the default maximum for every flight plan.
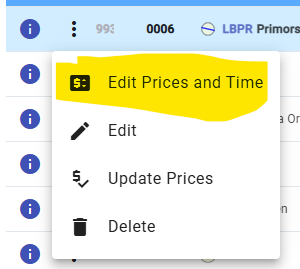
How to Edit: Use the “Edit Prices and Time” option in the grid menu for each flight pair.
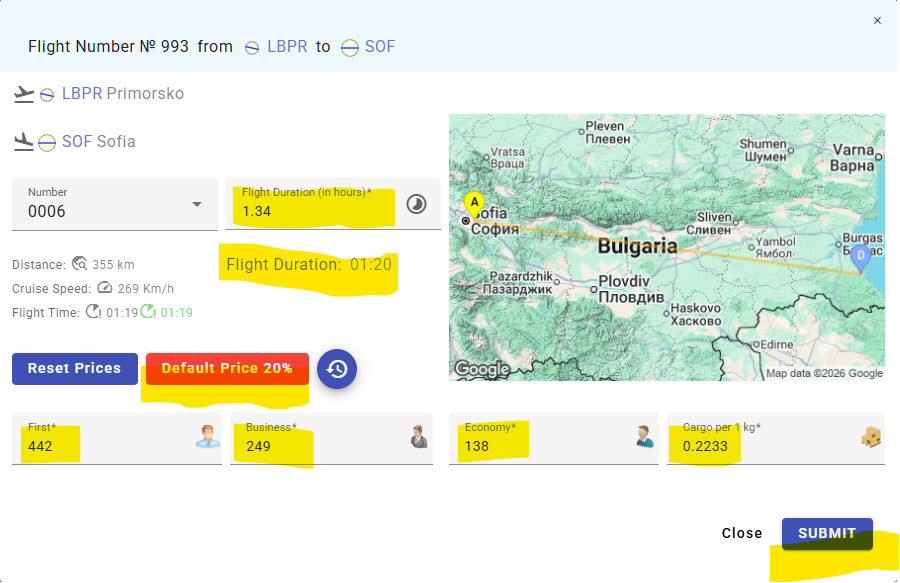
Automatic Sync: Don’t worry about doing double the work—the price and time settings will automatically synchronize between both legs of your round-trip.
Using the Global Pricing Factor
For a faster approach, look for the “Settings” icon in the top navigation menu. Here, you can adjust your Airline Ticket Price Factor.
- Use the red calculation button to automatically update all prices for your flight plans based on your global strategy.
- CRITICAL: Do not forget to hit the Submit button to save your changes. If you navigate away without submitting, your pricing work will be lost!
Step 5: Building the Weekly Schedule
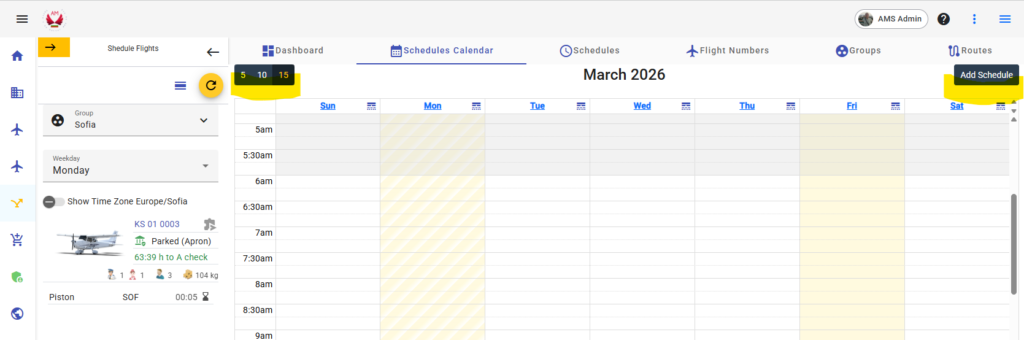
With your flight plans and pricing set, it’s time to fill the calendar. Navigate to the Schedule Calendar tab to begin assigning your flight sequences.
Adding Flights to the Calendar
Add a Flight: Click the “Add Schedule” button (located in the top corner of the interface).
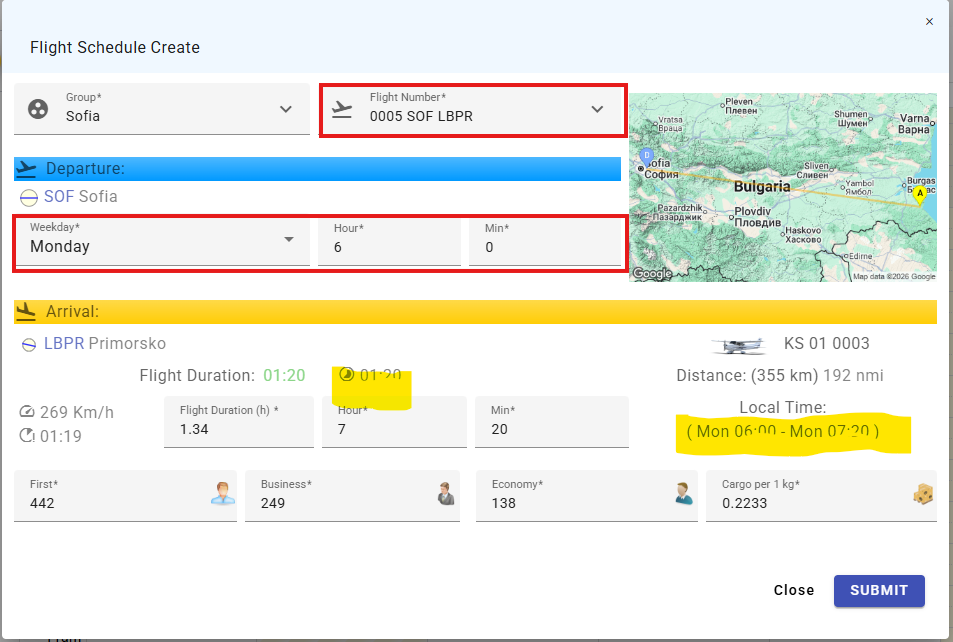
- Select Your Flight Number: Choose one of the flight plans you created earlier from the dropdown menu.
- Set the Departure: Adjust the Day and Time for the first leg of your trip.
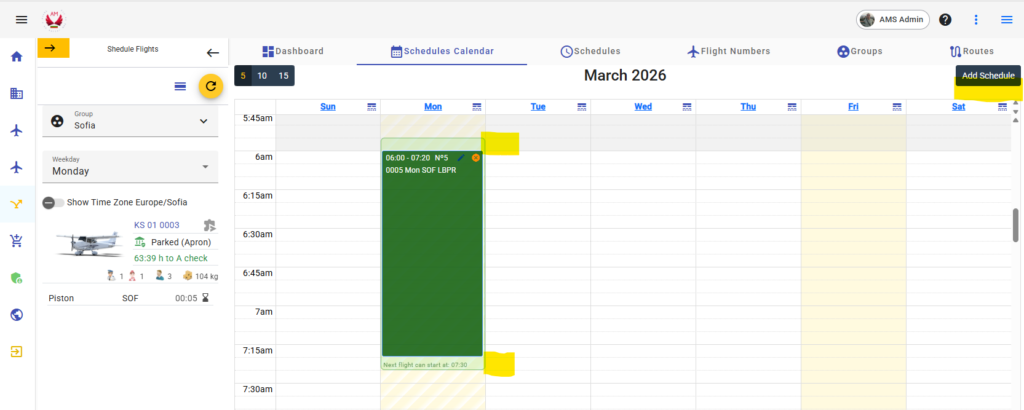
- Manage Turnaround Time: While the game provides a visual block for Turnaround Time (the time needed to prep the aircraft between flights), the actual Starting Time is your responsibility. Always ensure your next flight starts after the previous flight’s turnaround period has ended.
Streamlining the Process
The AMS system is designed to help you build a sequence quickly:
- Smart Proposals: Every time you click “Add Schedule,” the system will automatically propose a starting time and day based on the flight currently selected on your calendar.
- Daily Copy Feature: If you want to fly the exact same route sequence every day of the week, don’t do it manually! Use the “Day Copy” functionality at the top of the Schedule tab to duplicate your daily plan across the entire week in seconds.

Leave a Comment